If you search for dos and don’ts of painting cabinets, you are likely trying to avoid peeling paint, brush marks, and wasted time. Painting cabinets can look simple on the surface, but most failures happen because of rushed prep, wrong materials, or poor timing. Done right, painted cabinets can last for years and look close to a factory finish. Done wrong, they start chipping within months.
This guide focuses on what truly matters. No fluff, no shortcuts that backfire later. These are the practical dos and don’ts that separate a durable cabinet finish from one that looks good only for a few weeks.
Why Cabinet Painting Fails More Often Than It Succeeds
Cabinets are high-touch surfaces. They demand far more durability than most painted surfaces. Hands, oils, moisture, heat, and constant movement all work against the paint. Wall paint techniques do not apply here. Cabinets need stronger prep, tougher coatings, and more patience.
Most problems trace back to three mistakes:
- Poor surface preparation
- Using the wrong products
- Rushing drying and curing time
If you control those three, the results change completely.
The Dos of Painting Cabinets That Hold Up
These fundamentals are what separate durable cabinet finishes from those that fail early.
1. DO plan the job like a multi-day project
Cabinet painting only works when it’s treated as a process, not a quick weekend task.
2. DO give yourself enough time
Painting cabinets is not a one or two-day job. A proper timeline usually spans several days, sometimes a full week. Drying time between steps matters more than speed.
Rushing leads to soft paint, fingerprints, and edges that chip early.
3. DO remove doors, drawers, and hardware
Painting cabinets in place almost guarantees drips and uneven coverage. Remove everything.
Label each door and drawer. Bag the hardware. A simple numbering system saves hours during reinstallation and prevents hinge alignment issues later.
4. DO take surface prep seriously
Prep is where most cabinet paint jobs succeed or fail, and understanding how to prep and paint kitchen cabinets sets the foundation for a durable finish.
5. DO clean every surface thoroughly
Kitchen cabinets hold grease even when they look clean. Paint will not bond to grease.
Use a strong degreaser or TSP substitute. Scrub everything. Rinse well. Let it dry completely before sanding.
Skipping this step is one of the fastest ways to guarantee peeling paint.
6. DO fill holes and damage
Old screw holes, dents, and deep grain should be addressed before primer.
Use wood filler. Let it cure. Sand it flush. This is the only way to get a smooth, finished look, especially if you are changing hardware.
7. DO use a high-quality bonding primer
Primer is not optional for cabinets. It blocks stains, improves adhesion, and stabilizes the surface.
If you are painting over oil-based finishes, a bonding primer is required. Without it, modern paints can peel even if the surface looks fine at first.
Tinting primer toward your final color can also improve coverage and reduce the number of finish coats.
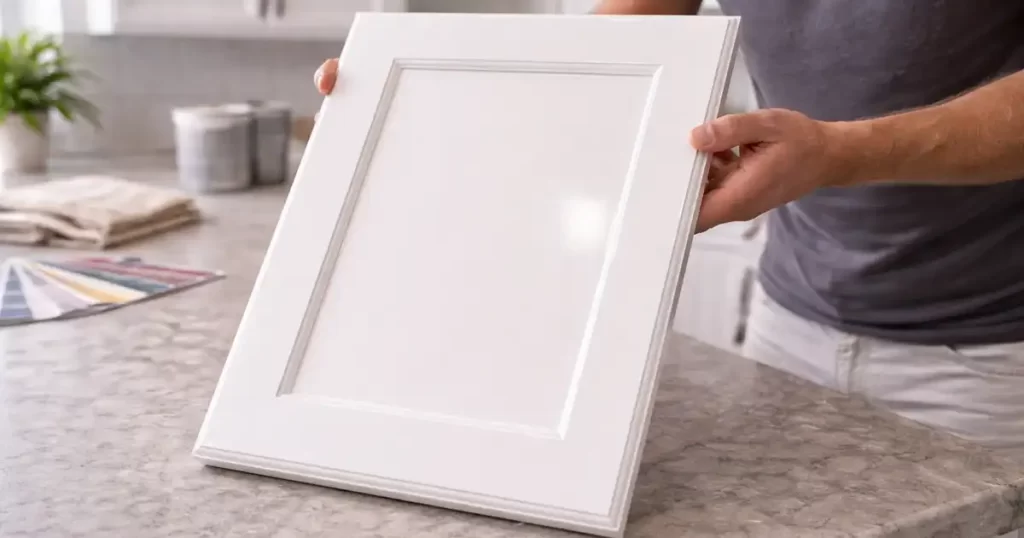
8. DO choose a practical sheen
Flat finishes show wear quickly and are hard to clean. Semi-gloss and satin are the most reliable options.
They clean easily and hide minor flaws better over time.
9. DO apply thin coats
Thick paint looks heavy and chips faster. Thin coats level better and cure more evenly.
Multiple light coats always outperform one heavy coat.
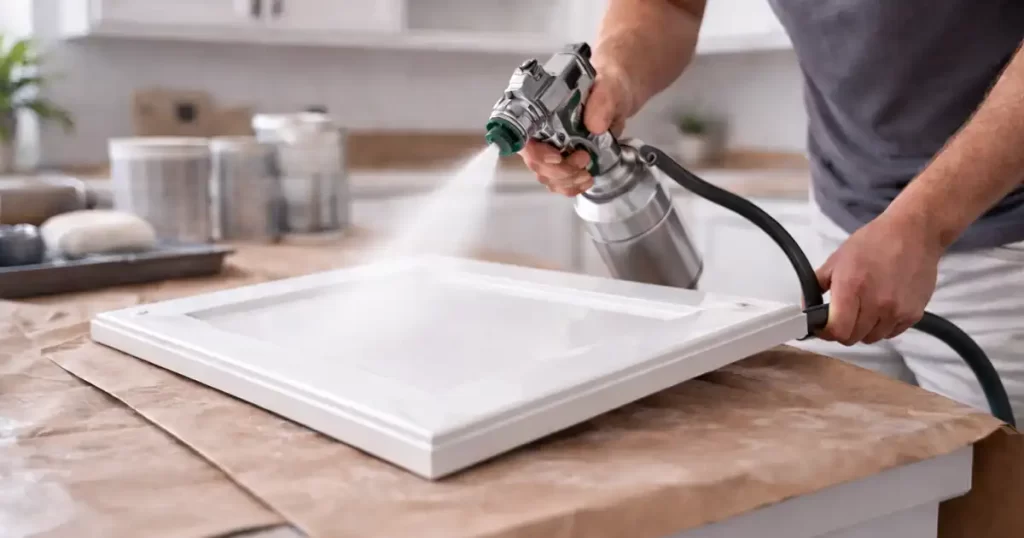
10. DO use the right tools
A paint sprayer delivers the smoothest finish if you know how to use it. When spraying is not an option, high-quality brushes and foam or microfiber rollers are the next best choice.
Cheap tools leave marks that no technique can fully hide.
11. DO paint in the correct order
Paint the backs of doors first. Then flip them to paint the fronts.
Any minor scuffs that happen during flipping will be hidden on the inside, not the visible face.
12. DO understand curing versus drying
Drying happens fast. Curing does not.
Cabinet paint often takes one to four weeks to reach full hardness. During this time, treat cabinets gently. Avoid scrubbing, slamming doors, or hanging heavy items.
This waiting period is what protects the finish long-term.
13. DO clean gently after painting
Use a soft cloth with mild soap and water.
Avoid abrasive pads, harsh cleaners, bleach, or ammonia. These break down the finish and dull the sheen.
14. DO handle chips immediately
Small chips happen. The problem starts when moisture gets underneath the paint.
Keep leftover paint for touch-ups. Fix damage early before it spreads.
Adding felt bumpers inside doors also reduces impact and protects edges.
Also Read: Sherwin Williams vs Benjamin Moore: Which Paint Brand Should You Choose?
The Don’ts That Cause Cabinet Paint to Fail
Most cabinet paint failures trace back to a few avoidable mistakes.
1. DON’T paint in bad conditions
Humidity, heat, and direct sunlight work against you. Paint needs stable conditions to level and cure properly.
Aim for moderate temperatures and low humidity. A controlled indoor space or garage with ventilation is ideal.
2. DON’T skip sanding
“No-sand” products are appealing, but sanding still matters.
Sanding gives the primer something to grip. It also removes minor imperfections that show through paint.
Use a medium grit for initial scuffing. Use fine grit between coats if needed. Always remove dust before moving on.
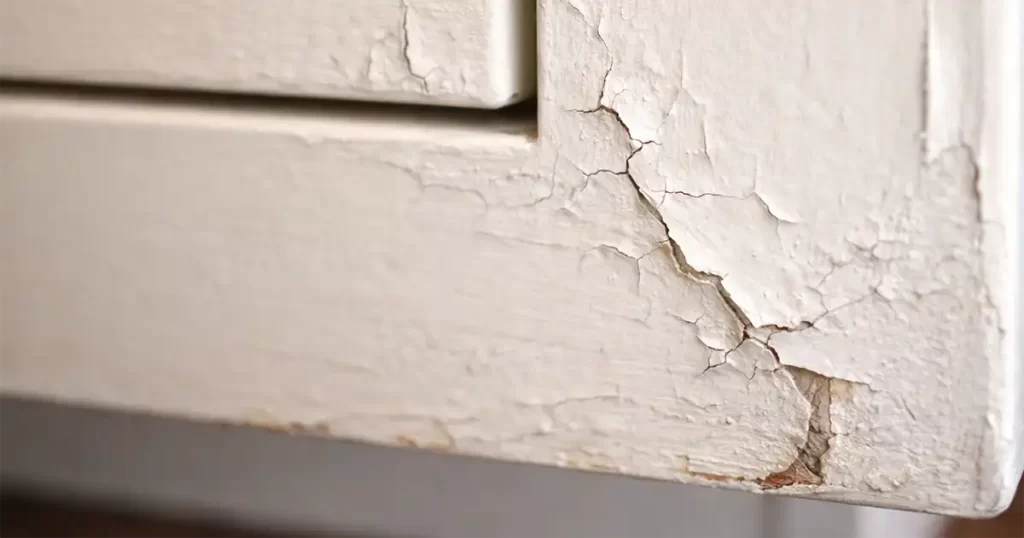
3. DON’T ignore older paint risks
Homes built before 1978 may contain lead-based paint. Sanding without precautions can be dangerous.
If you suspect lead, stop and address safety first, or bring in a professional.
4. DON’T use wall paint
Wall paint is too soft for cabinets. It scuffs easily and does not handle repeated contact.
Choose paint made for cabinets or trim. Acrylic-alkyd and urethane-based paints cure harder and resist wear far better.
5. DON’T rush recoat times
Paint may feel dry within hours, but that does not mean it is ready for the next coat.
Follow the manufacturer’s recoat instructions exactly. Recoating too soon traps moisture and weakens the finish.
6. DON’T reinstall too early
Paint may feel dry, but it is still soft underneath.
Wait at least two to three days before rehanging doors and reinstalling hardware. Handling them too soon leaves dents and fingerprints that do not disappear.
The Real Standard for Long-Lasting Painted Cabinets
The true dos and don’ts of painting cabinets come down to discipline. Prep correctly. Use products designed for cabinets. Respect drying and curing times.
Durable cabinet finishes come from discipline, not shortcuts or trends. Shortcuts almost always show later. Patience shows up every time you open a door that still looks good years after the paint dried.
If your goal is cabinets that hold up to daily use and still look intentional, follow the process, not the trends. That is what separates a temporary refresh from a finish that actually lasts.
When Not to DIY Cabinet Painting
Painting cabinets can be a manageable DIY project in some situations, but certain conditions require professional tools, preparation, and experience. Attempting to paint cabinets in poor condition can lead to peeling paint, uneven finishes, or costly repairs.
Consider hiring a professional cabinet painter if your cabinets show any of the following issues.
Cabinet Conditions That Require Professional Help
| Cabinet Condition | Why It’s a Problem | Risk of DIY |
|---|---|---|
| Peeling or Chipping Paint | Indicates adhesion failure or poor previous prep | New paint may fail quickly |
| Water Damage or Swelling | Wood may be structurally compromised | Paint will not adhere properly |
| Grease Buildup (Common in Kitchens) | Oils prevent proper bonding | Paint can separate or bubble |
| Warped or Cracked Doors | Requires repair or replacement before painting | Uneven finish and durability issues |
| Laminate or Thermofoil Cabinets | Require special primers and sanding methods | High risk of peeling |
| Mold or Mildew | Must be properly treated before painting | Health and adhesion risks |
| Heavy Wear or Deep Scratches | Surfaces need filling and resurfacing | Visible defects after painting |
Signs It’s Time to Hire a Professional Cabinet Painter
- Cabinets have visible water or structural damage
- Previous paint is peeling or failing
- Surfaces are laminate, veneer, or glossy finishes
- You want a factory-smooth finish
- The kitchen is heavily used and downtime must be minimized
Professional Cabinet Painting, Done Right
Painting cabinets the right way takes more than good intentions. It takes proper prep, the right products, and a team that understands how cabinet finishes behave long after the paint dries.
Our cabinet painting service is designed for homeowners who want a durable, clean, professional result without the cost or disruption of cabinet replacement. From surface preparation to final inspection, every step is handled with care so your cabinets look good and stay that way.
If you’re considering cabinet painting or want a second opinion before starting, call us at (615) 673-5773 or contact us to talk through your options and timeline.
Frequently Asked Questions About Painting Cabinets
Is painting cabinets worth it compared to replacing them?
Yes. Painting cabinets typically costs significantly less than replacing them while still improving the appearance of a kitchen. Many homeowners choose cabinet painting to extend the life of existing cabinets without a full renovation.
How long does cabinet paint last?
Professionally painted cabinets usually last 8 to 15 years, depending on preparation, paint quality, and daily use. Proper cleaning and maintenance can extend the lifespan.
Can you paint laminate cabinets?
Yes, but laminate cabinets require special primers and careful surface preparation to ensure proper adhesion. Without the right materials and technique, paint may peel or chip prematurely.
How long does it take to paint kitchen cabinets?
Most cabinet painting projects take 3 to 5 days, depending on the size of the kitchen, drying time, and preparation work required.
Do cabinets need to be sanded before painting?
Yes. Sanding helps paint adhere properly and creates a smoother finish. Skipping this step is one of the most common causes of peeling cabinet paint.