You walk past your living room wall and notice something odd. What looked perfectly smooth last month now has a web of tiny lines spreading across the surface like a road map. Your paint is cracking, and you’re wondering what went wrong.
The answer usually comes down to a few common culprits: poor surface preparation, temperature swings during application, or using low-quality paint on surfaces that needed something better. Sometimes it’s moisture sneaking in where it shouldn’t, other times it’s just age catching up with your walls.
Let’s figure out what’s happening with your paint and how to fix it before those hairline cracks turn into a bigger problem.
What Causes Paint to Crack?
Paint cracking happens when your topcoat system loses its flexibility and starts breaking down. Think of it like old rubber bands that snap when you stretch them.
Poor surface preparation is the biggest culprit. When you skip proper cleaning or don’t sand down glossy surfaces, the new paint just sits on top without really bonding. It might look fine at first, but after a few weeks or months, you’ll start seeing the consequences.
Using low-quality paint on demanding surfaces sets you up for failure from the start. Bare wood, masonry surfaces, and even drywall need quality paint that can handle expansion and contraction. Cheap paint might save you money now, but you’ll pay for it when you’re scraping and repainting a year later.
Different Types of Paint Failure
Not all cracking paint looks the same:
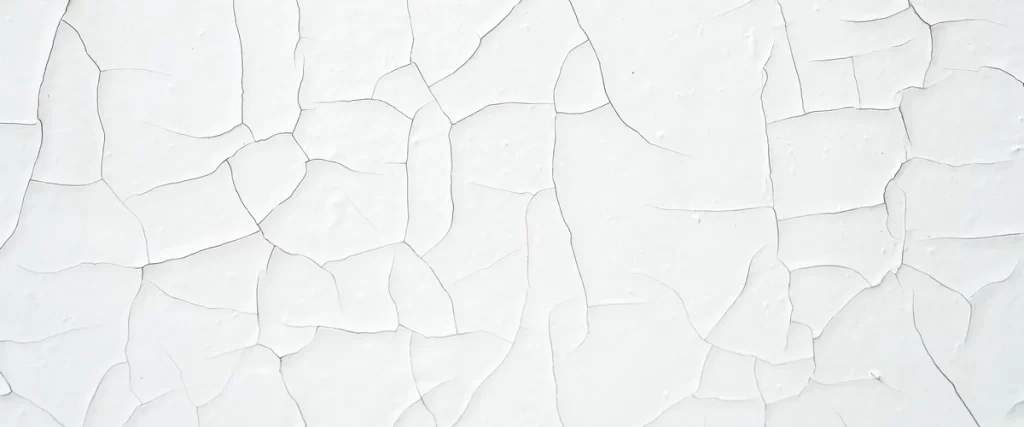
- Hairline cracks form those thin spiderweb patterns you might barely notice in the early stages. They’re usually caused by paint drying too quickly or by a coat that’s too thin.
- Flaking paint is worse. This happens when inadequate adhesion lets entire chunks of paint pull away from the substrate. You’ll often see this on wood surfaces where moisture has gotten underneath, or on walls where the original paint wasn’t compatible with the paint that got slapped on top.
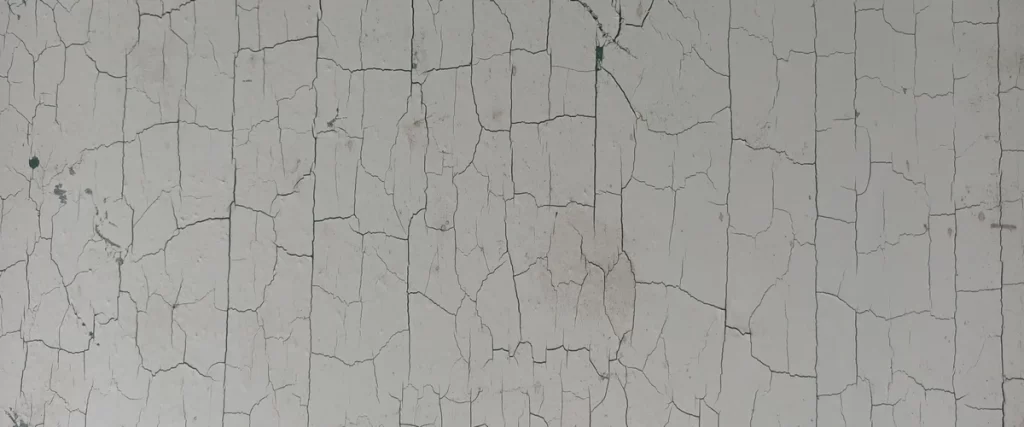
- Alligatoring creates a scaly pattern that looks, well, like alligator skin. This typically happens when you apply a hard paint over a soft one, or when oil-based paints age and lose their flexibility. Temperature swings make this worse.
How to Fix Cracking Paint
Here’s where you roll up your sleeves. Fixing paint cracking means addressing the root cause, not just covering it up with another coat.
Step 1: Remove the Damaged Paint
Start by scraping off all the loose and flaking paint with proper tools. A wire brush works great for getting into textured surfaces and corners.
You need to get down to a solid surface, even if that means removing multiple layers. Sand the edges where good paint meets bare substrate to avoid obvious ridges.
If you’re dealing with a house built before 1978, there’s a real chance your old paint contains lead. The EPA requires specific safety measures when working with lead paint. So, don’t start scraping without knowing what you’re dealing with. Testing kits are cheap compared to the potential health problems.
Step 2: Fix the Underlying Issues
Got moisture problems? Find where water’s getting in and seal it before you do anything else. Caulk gaps around windows, fix that leaky pipe, and improve ventilation in humid rooms. Painting over moisture issues is like putting a bandage on a broken bone.
Check your substrate too. Plywood and other wood surfaces might need repairs. Drywall could have damage that needs patching. Masonry surfaces may require special preparation. Whatever the material, it needs to be clean, dry, and sound before you add new paint.
Step 3: Prime Properly
This step matters more than most people think. A high-quality primer creates the bond between your surface and topcoat. For exterior work or challenging surfaces, you need a primer that matches your situation. Oil-based primers work great on wood, while masonry needs its own formulation.
Let that primer dry completely according to the manufacturer’s instructions. Rushing this stage causes problems down the road. If you’re tackling exterior painting projects, weather conditions matter even more. Paint in temperatures between 50 and 85°F when possible, and avoid high-humidity days.
Step 4: Apply Quality Paint
Here’s where investing in high-quality paint pays off. Spreading paint too thin to save money creates weak spots that crack easily. Follow the coverage rates on the can. Most surfaces need one or more coats, sometimes two or three, depending on color changes and the substrate you’re covering.
Let each coat dry thoroughly before adding the next one. When paint dries in layers that haven’t bonded properly, you’re setting yourself up for future failure. Take your time. The air temperature and humidity both affect drying times, so adjust your schedule accordingly.
Preventing Paint from Cracking
Once you’ve fixed everything, you want to keep it looking good.
For your next painting project, start with proper surface preparation every single time. Clean walls thoroughly, sand smooth any rough spots, and remove all dust before you open that paint can.
You should buy quality paint and primer. Yeah, it costs more upfront, but you’ll repaint half as often. Quality products contain better binders and pigments that stay flexible longer and resist environmental conditions better than bargain brands.
Pay attention to application conditions. Don’t paint when it’s too cold, too hot, or too humid. Don’t put oil-based paint over latex without proper prep. Don’t rush the drying time between coats. Most paint failures happen because someone skipped these basics.
FAQ
What causes paint to crack shortly after painting?
Fresh paint cracks when it dries too quickly or too slowly, due to temperature and humidity. Applying paint when it’s below 50°F or above 90°F, or spreading it too thick in one coat, prevents proper curing. You might also have compatibility problems if you put latex over oil without adequate prep.
Can I paint over cracked paint?
You can’t just paint over cracking paint and expect good results. The new coat will follow the same crack patterns, and you’ll probably see paint failure even faster. Remove all loose material, properly prep the surface, and then repaint. Taking shortcuts here wastes time and money.
Why does paint crack in corners?
Corners are stress points where walls meet. Paint naturally pulls and stretches in these areas as your house settles and temperature changes. If you didn’t work the paint into corners properly during application, or if there’s movement in the structure, you’ll see cracks appear at these vulnerable spots first.
How do I know if my paint cracking is a serious problem?
Small hairline cracks might just be cosmetic, but widespread cracking, flaking paint, or cracks that keep getting bigger point to bigger issues. Look for moisture stains, soft spots in walls, or cracks that go through to the substrate. These need immediate attention before they lead to structural damage.
What’s the difference between checking and alligatoring?
Checking creates small, shallow cracks in the paint surface but doesn’t penetrate all the way through. Alligatoring goes deeper, creating the distinctive scaly pattern where the paint actually splits. Both indicate paint failure, but alligatoring is more advanced and requires more extensive repair.
Let the Professionals Handle It
Between scraping, sanding, priming, painting, and waiting for everything to dry, fixing cracked paint takes time and effort. If you mess up any step along the way, you get to do it all over again.
Sometimes it makes more sense to hand the job to people who do this every day. We’ve got the experience to spot problems you might miss, the proper tools to prep surfaces correctly, and the skills to apply paint so it actually lasts.
Call us at (615) 673-5773 or message us here, and we’ll handle the scraping, sanding, priming, and painting while you handle more important things.